all was tested on linux mint 19
一、软件清单
gcc-arm-none-eabi-toolchain(交叉编译工具链),
VSCode(用来编辑),
OpenOCD(调试/下载),
STM32CubeMX(使用ST的HAL/LL库)
请读者先去了解清楚下面的问题再往下阅读:
什么是编译工具链?
gcc-arm-none-eabi-toolchain与PC本地的gcc、keil ARMCC和IAR ICC有什么不同?
gcc-arm-none-eabi-toolchain中的eabi有什么含义?
什么是openocd?openocd和jlink、stlink的区别?
什么是STM32Cube?
二、软件安装
1. gcc-arm-none-eabi-toolchain:
打开https://developer.arm.com,点击“Linux/Open Source”, 找到GNU Toolchain / GNU-R M Download , 进去下载页 选一个下载。例如这里我直接下载了最新的 7-2018-q2 版本, 将下载的包解压到/opt,并添加到PATH, 打开命令行, 操作如下:
$ cd /opt
$ sudo tar xjf ~/Downloads/gcc-arm-none-eabi-7-2018-q2-update-linux.tar.bz2
$ export PATH="/opt/gcc-arm-none-eabi-7-2018-q2-update/bin:$PATH"
$ arm-none-eabi-gcc -v
gcc version 7.3.1 20180622 (release) [ARM/embedded-7-branch revision 261907] (GNU Tools for Arm Embedded Processors 7-2018-q2-update)
到这里完成编译工具链的安装(我建议你下载几个版本工具链放着) (如果你下载GCC的网速太慢了导致下载失败,你可以在这里直接下载)
2. VSCode安装: https://code.visualstudio.com
这个安装很简单我就不多说了,自行官网下载安装
3. OpenOCD
安装最简单方式:
$ sudo apt-get install openocd
$ openocd -v
目前安装的是0.10.0版本
由于在开发stm32L496ZGT6中出了些问题:
> flash erase_sector 0 0 255
Cannot identify target as a STM32L4 family.
auto_probe failed
in procedure ‘target’
我下载源码编译了一个新的,开箱即用成品(推荐):
本站直接下载: Click
百度云链接: Click
下载后同上解压到/opt目录,然后添加/opt/openocd/bin路径到PATH,
$ export PATH="/opt/openocd/bin:$PATH"
$ openocd -v
Open On-Chip Debugger 0.10.0+dev-snapshot (2018-07-12-01:37)
Licensed under GNU GPL v2
For bug reports, read
    http://openocd.org/doc/doxygen/bugs.html
3. STM32CubeMX 去ST官网下载安装包安装即可,需要安装java运行环境,注意对应java版本(java版本更新快,装太新的话,这个软件很可能会用不了)
三、测试开发环境
由于笔者目前只有一块STM32 NUCLEO L496ZGT6,以下测试均针对此开发板:
1 打开stm32CubeMX 
2 新建项目,左上边搜索框搜索,选择对应板子,双击进入,效果如图: 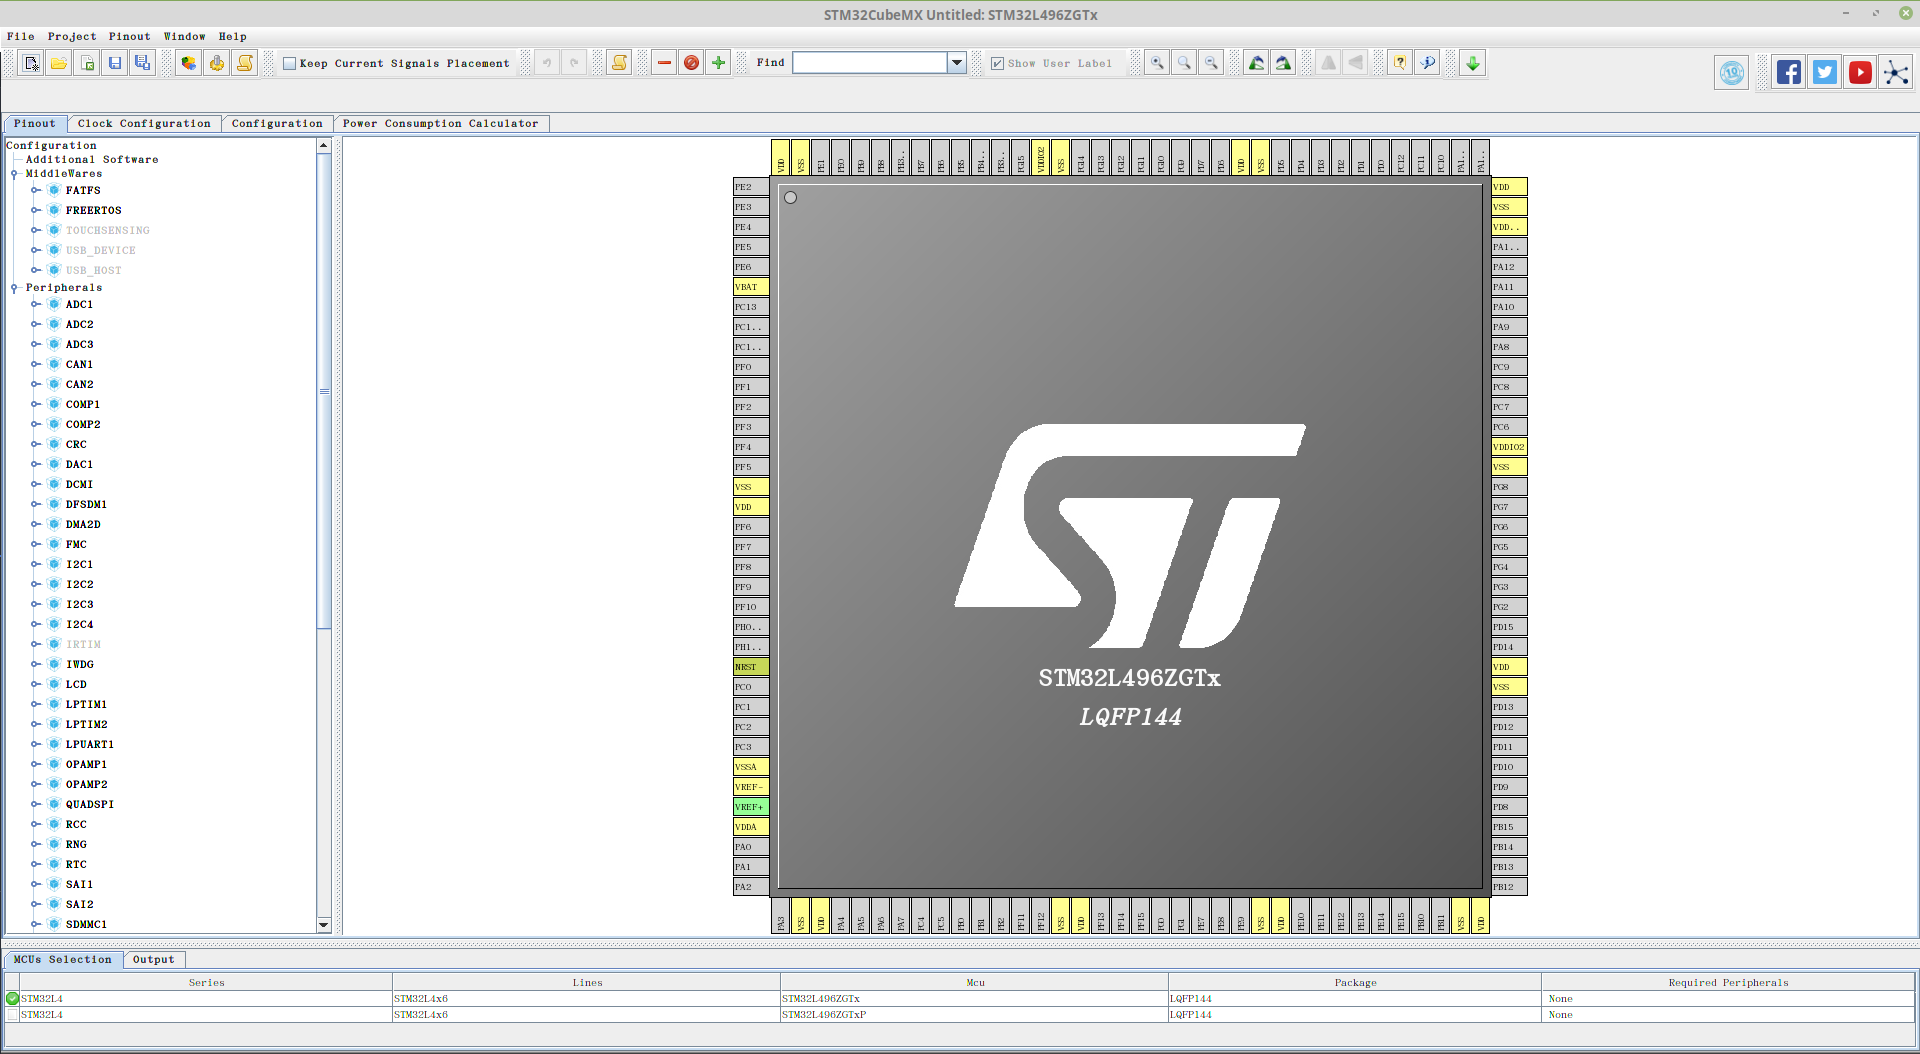
3 打开原理图,查找led,比如我这里: 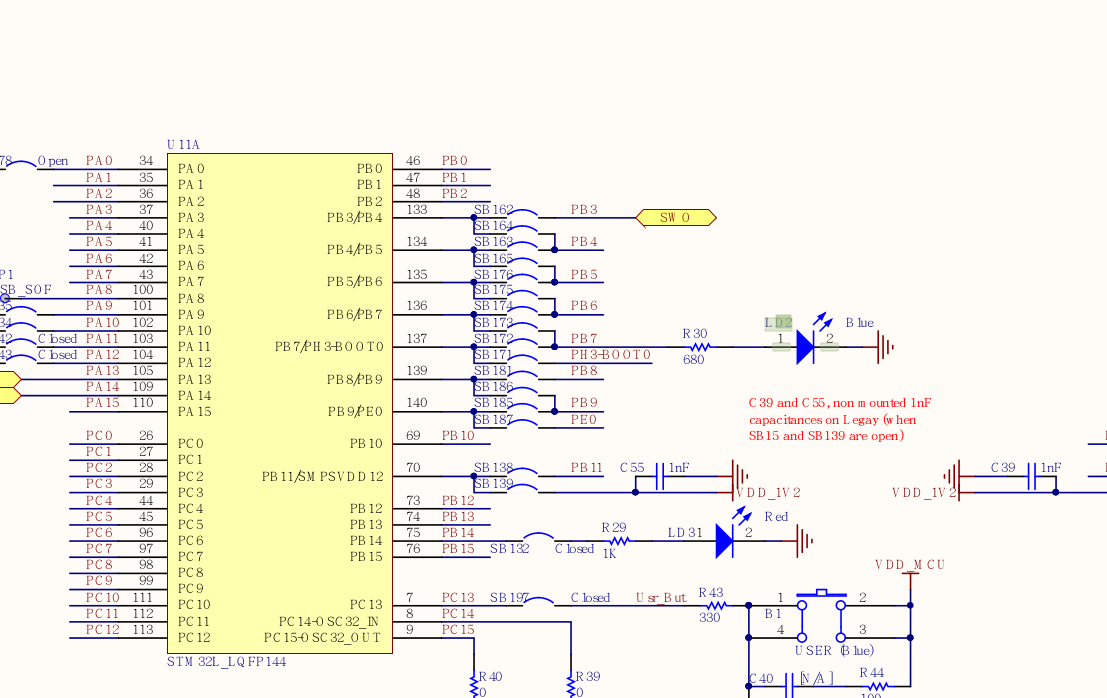 从原理图可以看出,要使LD2亮起来,则要控制PB7输出高电平,产生电压差使有电流通过LD2。回到cube,Find 引脚PB7,配置其为GPIO_Output,给它个标签“LD2”,
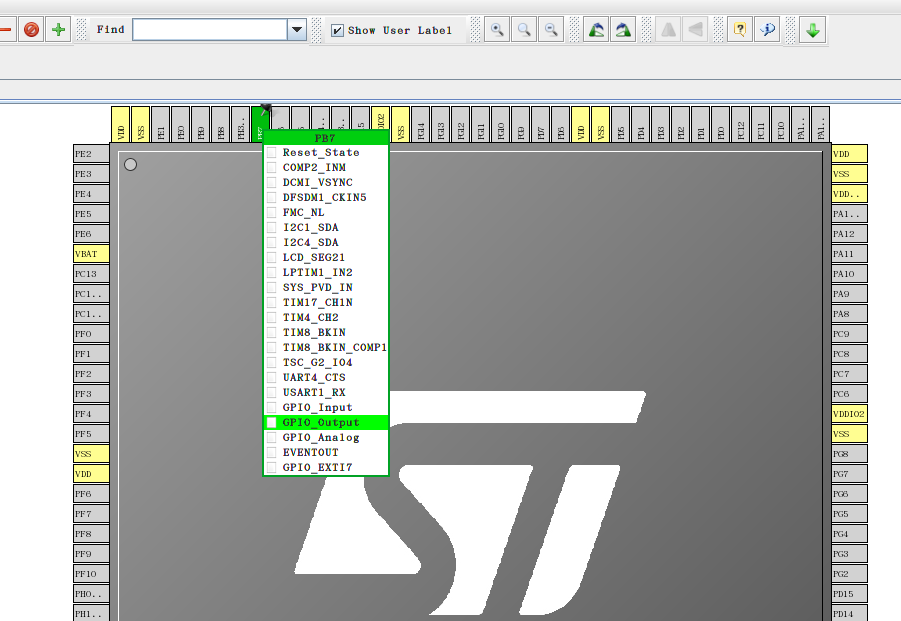
4 其它的默认就行,然后generate project,命名LED,路径自己选一个,Toolchain/IDE选项选makefile,其它默认就行 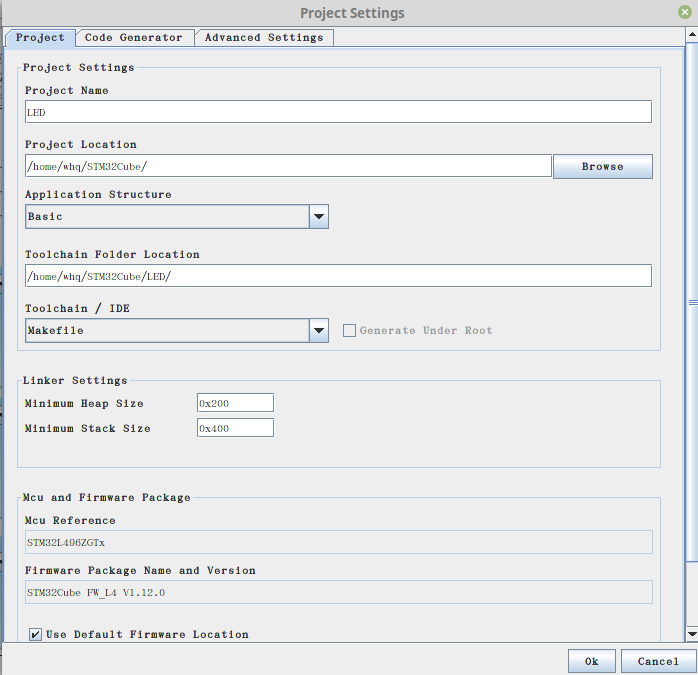
5 项目地址里打开命令行: (用vscode打开当前文件夹) 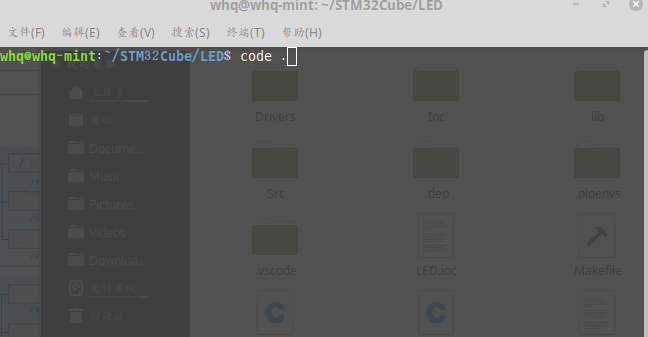
ctrl+` 打开命令行,输入make进行编译代码,检查下有没有问题。  从结果可以看出来,编译产生了三个不同格式的可执行文件,它们的区别后面再讲。编译已经完成。 打开main.c,在while(1)里添加如下代码:
HAL_GPIO_TogglePin(LD2_GPIO_Port, LD2_Pin);
HAL_Delay(500);
再次make,编译完成。可执行文件有了,要怎么弄到板子上运行?这时候就轮到了强大的openocd显神威了!
6 使用openocd烧录可执行文件到开发板上
烧录代码,一行命令搞定,它看起来是这样子:
whq@whq-mint:~/STM32Cube/LED$ openocd -f interface/stlink.cfg -f target/st_nucleo_l4xx.cfg -c "program build/LED.hex reset exit"
Open On-Chip Debugger 0.10.0+dev-snapshot (2018-07-12-01:37)
Licensed under GNU GPL v2
For bug reports, read
        http://openocd.org/doc/doxygen/bugs.html
Info : The selected transport took over low-level target control. The results might differ compared to plain JTAG/SWD
adapter speed: 500 kHz
adapter_nsrst_delay: 100
none separate
srst_only separate srst_nogate srst_open_drain connect_deassert_srst
Info : Unable to match requested speed 500 kHz, using 480 kHz
Info : Unable to match requested speed 500 kHz, using 480 kHz
Info : clock speed 480 kHz
Info : STLINK v2 JTAG v28 API v2 SWIM v18 VID 0x0483 PID 0x374B
Info : using stlink api v2
Info : Target voltage: 3.255790
Info : stm32l4x.cpu: hardware has 6 breakpoints, 4 watchpoints
Info : Listening on port 3333 for gdb connections
Info : Unable to match requested speed 500 kHz, using 480 kHz
Info : Unable to match requested speed 500 kHz, using 480 kHz
adapter speed: 480 kHz
target halted due to debug-request, current mode: Thread
xPSR: 0x01000000 pc: 0x08000dfc msp: 0x20050000
adapter speed: 4000 kHz
** Programming Started **
auto erase enabled
Info : device id = 0x20006461
Info : flash size = 1024kbytes
target halted due to breakpoint, current mode: Thread
xPSR: 0x61000000 pc: 0x2000004e msp: 0x20050000
Warn : block write succeeded
wrote 6144 bytes from file build/LED.hex in 0.235084s (25.523 KiB/s)
** Programming Finished **
** Resetting Target **
Info : Unable to match requested speed 500 kHz, using 480 kHz
Info : Unable to match requested speed 500 kHz, using 480 kHz
adapter speed: 480 kHz
shutdown command invoked
开发板上的LED正在闪烁ing……测试完成
(上面的 interface/ 和 target/目录都在openocd/shared/scripts/目录下,请读者花几分钟去该目录浏览一番。
其中-c “program …” program后接的文件类型,如果是.bin则后面要跟地址值,比如0,如果是.hex或者是.elf文件,则无需填写地址,因为这两种文件里已经包含了烧录地址这些信息。)
“每次烧录都要输这么长命令,岂不是很麻烦?”
确实挺麻烦的。
让我们回到vscode, Ctrl+Shift+B, 新建一个task.json:
{
    // See https://go.microsoft.com/fwlink/?LinkId=733558
    // for the documentation about the tasks.json format
    "version": "2.0.0",
    "tasks": [
        {
            "label": "upload",
            "type": "shell",
            "command": "openocd -f board/st_nucleo_l4.cfg -c \"program build/LED.hex reset exit\" ",
            "group": {
                "kind": "build",
                "isDefault": true
            }
        }
    ]
}
再次Ctrl+Shift+B,如何?很舒服吧!我们再改一下:
{
    "version": "2.0.0",
    "tasks": [
        {
            "label": "build",
            "type": "shell",
            "command": "make"
        },
        {
            "label": "build and load",
            "type": "shell",
            "command": [
                "make  &&",
                "openocd -f board/st_nucleo_l4.cfg -c \"program build/$(ls build | grep elf) reset exit \" "
            ],
            "group": {
                "kind": "build",
                "isDefault": true
            }
        }
    ]
}
Ctrl+Shift+B即完成编译和调试,是不是舒服多了?
编译烧录就讲到这里。
7 使用vscode调试代码:
调试工具使用的是arm-none-eabi-gdb。
首先,我们用命令行来试下单步调试,打开terminal:
whq@whq-mint:~$ openocd -f board/st_nucleo_l4.cfg
Open On-Chip Debugger 0.10.0+dev-snapshot (2018-07-12-01:37)
Licensed under GNU GPL v2
For bug reports, read
	http://openocd.org/doc/doxygen/bugs.html
Info : The selected transport took over low-level target control. The results might differ compared to plain JTAG/SWD
adapter speed: 500 kHz
adapter_nsrst_delay: 100
none separate
srst_only separate srst_nogate srst_open_drain connect_deassert_srst
Info : Listening on port 6666 for tcl connections
Info : Listening on port 4444 for telnet connections
Info : Unable to match requested speed 500 kHz, using 480 kHz
Info : Unable to match requested speed 500 kHz, using 480 kHz
Info : clock speed 480 kHz
Info : STLINK v2 JTAG v28 API v2 SWIM v18 VID 0x0483 PID 0x374B
Info : using stlink api v2
Info : Target voltage: 3.255790
Info : stm32l4x.cpu: hardware has 6 breakpoints, 4 watchpoints
Info : Listening on port 3333 for gdb connections
打开一个新的terminal:
whq@whq-mint:~/STM32Cube/LED$ arm-none-eabi-gdb build/LED.elf
GNU gdb (GNU Tools for Arm Embedded Processors 7-2017-q4-major) 8.0.50.20171128-git
Copyright (C) 2017 Free Software Foundation, Inc.
License GPLv3+: GNU GPL version 3 or later <http://gnu.org/licenses/gpl.html>
This is free software: you are free to change and redistribute it.
There is NO WARRANTY, to the extent permitted by law.  Type "show copying"
and "show warranty" for details.
This GDB was configured as "--host=x86_64-linux-gnu --target=arm-none-eabi".
Type "show configuration" for configuration details.
For bug reporting instructions, please see:
<http://www.gnu.org/software/gdb/bugs/>.
Find the GDB manual and other documentation resources online at:
<http://www.gnu.org/software/gdb/documentation/>.
For help, type "help".
Type "apropos word" to search for commands related to "word"...
Reading symbols from build/LED.elf...done.
(gdb) target remote 3333
3333: No such file or directory.
(gdb) target remote localhost:3333
Remote debugging using localhost:3333
0x08000f2a in HAL_PWREx_ControlVoltageScaling (VoltageScaling=33)
    at Drivers/STM32L4xx_HAL_Driver/Src/stm32l4xx_hal_pwr_ex.c:265
265           while ((wait_loop_index != 0) && (HAL_IS_BIT_SET(PWR->SR2, PWR_SR2_VOSF)))
(gdb) s
halted: PC: 0x08000f0c
halted: PC: 0x08000f0e
halted: PC: 0x08000f10
halted: PC: 0x08000f2e
halted: PC: 0x08000f30
halted: PC: 0x08000f32
269           if (HAL_IS_BIT_SET(PWR->SR2, PWR_SR2_VOSF))
(gdb) c
Continuing.
觉得稍微有点麻烦吗?我们再回到vscode,搜索插件Cortex Debug,安装,按F5,添加cortex debug的配置,launch.json配置如下:
{
    // Use IntelliSense to learn about possible attributes.
    // Hover to view descriptions of existing attributes.
    // For more information, visit: https://go.microsoft.com/fwlink/?linkid=830387
    "version": "0.2.0",
    "configurations": [
        {
            "name": "Cortex Debug",
            "cwd": "${workspaceRoot}",
            "executable": "./build/LED.elf",
            "request": "launch",
            "type": "cortex-debug",
            "servertype": "openocd",
            "BMPGDBSerialPort": "/dev/ttyACM0",
            "runToMain": true,
            "device": "STM32L496ZG",
            "configFiles": [
                "board/st_nucleo_l4.cfg"
            ]
        }
    ]
}
再来F5, 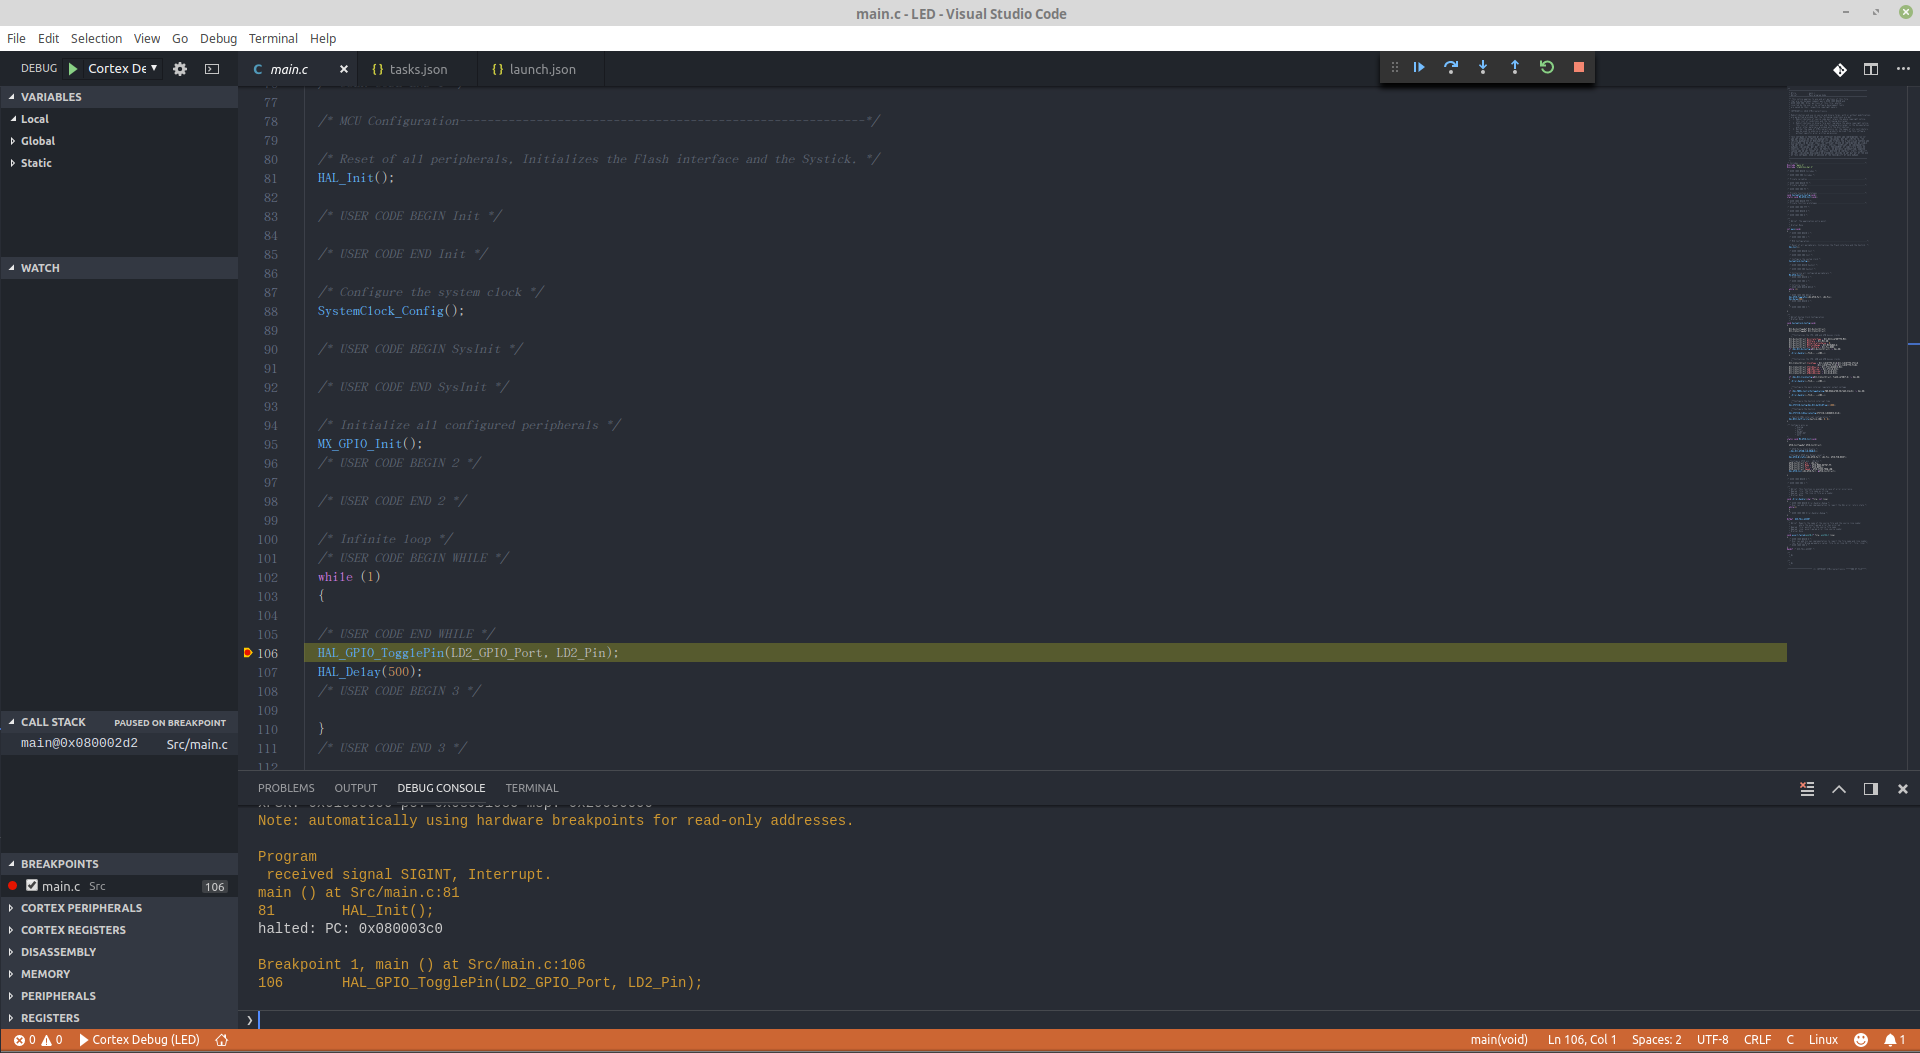
点击左下DISASSEMBLY 下的 Switch to assembly/code可以在汇编和c代码之间切换: 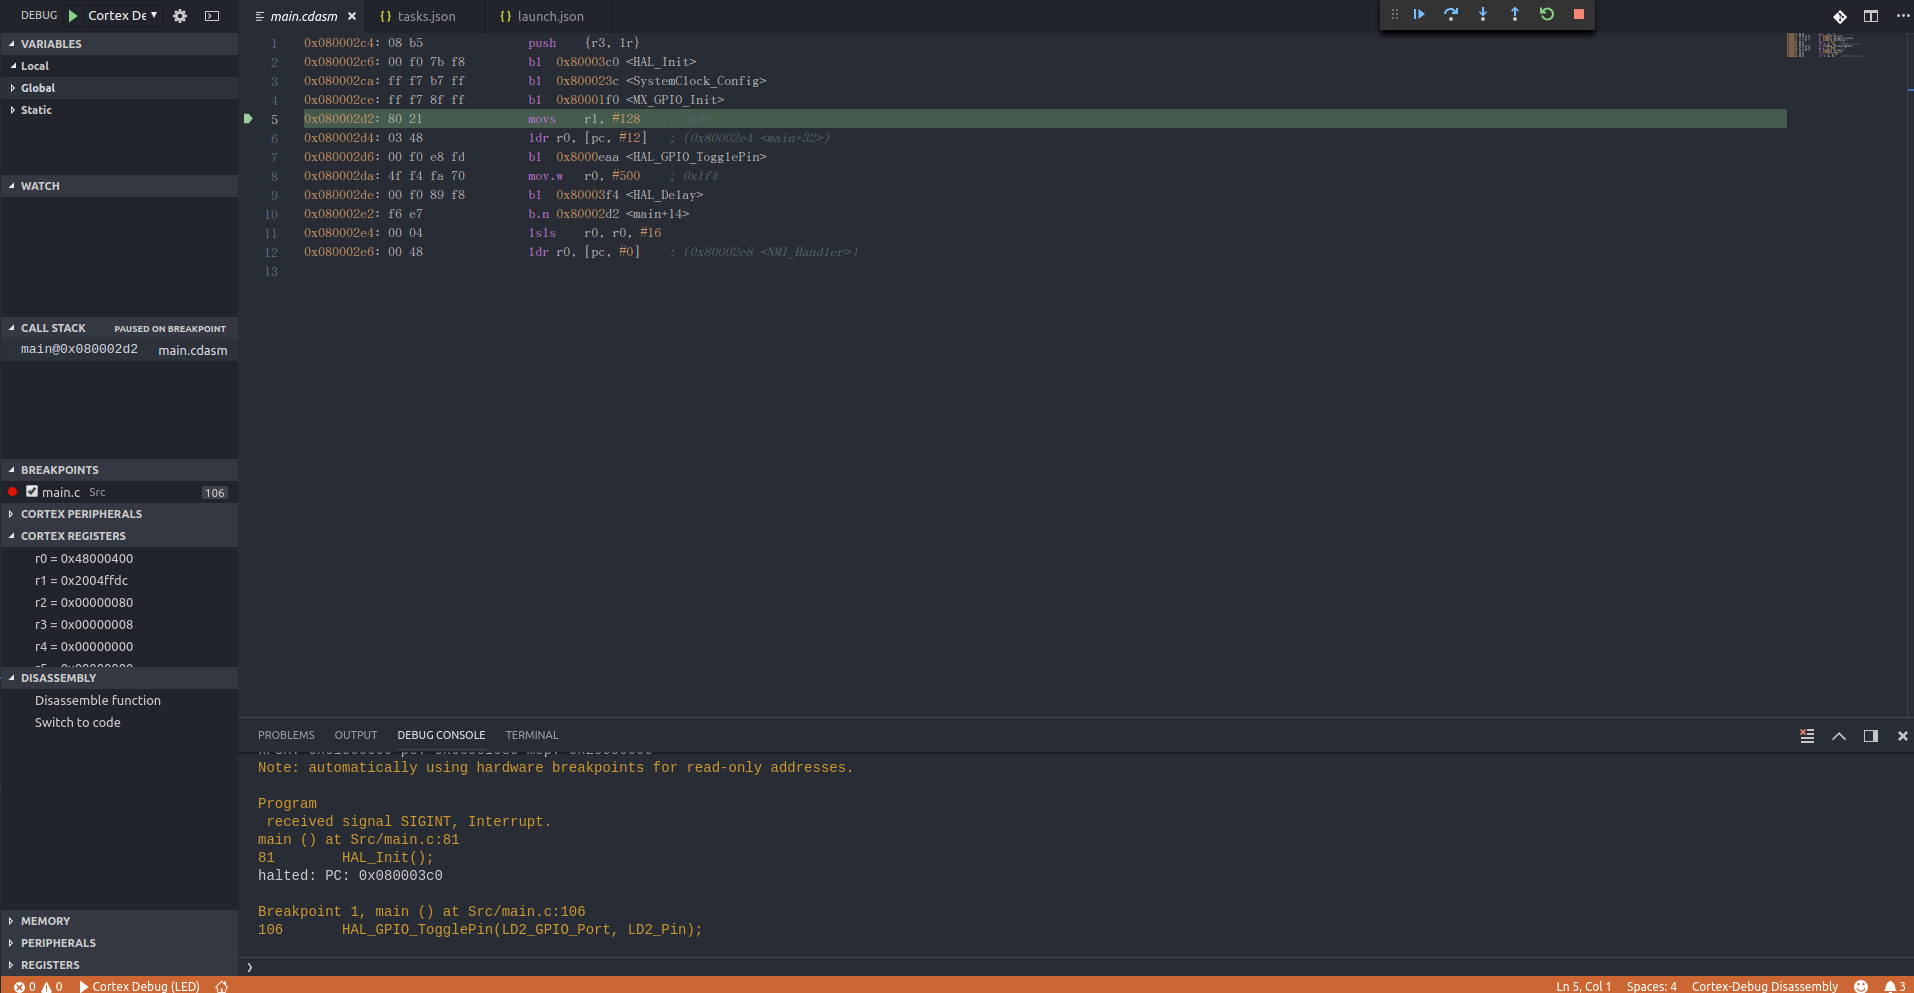 图形界面的调试方式就ok了!
开始快乐地开发stm32!
End
此篇结束。
下一篇: 使用vscode+platformIO开发stm32
版权声明:本文为博主原创文章,转载请表明出处